We regularly revise our Raspberry Pi image and add new features, so it makes sense to upgrade, especially if the operating system version has changed.
Of course you will want to keep your old settings and data. So we will describe here in detail how to transfer your old settings to the new image. If you have two sd cards, we recommand to create the new image on the second sd card (ideally a high endurance sd card for increased data safety) so you know you have a working fallback.
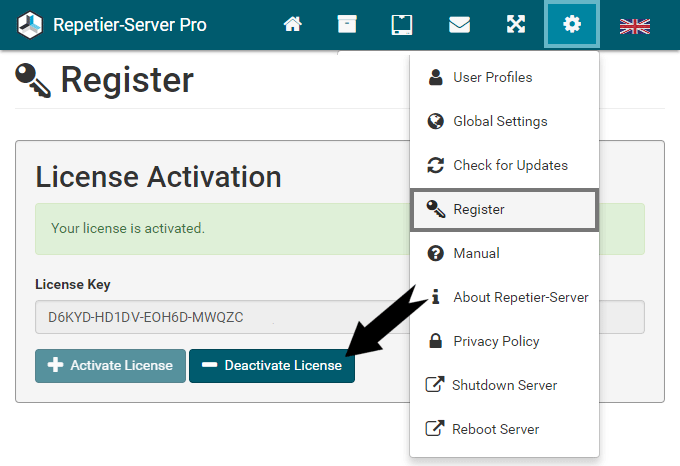
- If you have a license, write down your license key and deactivate it on the Register page.
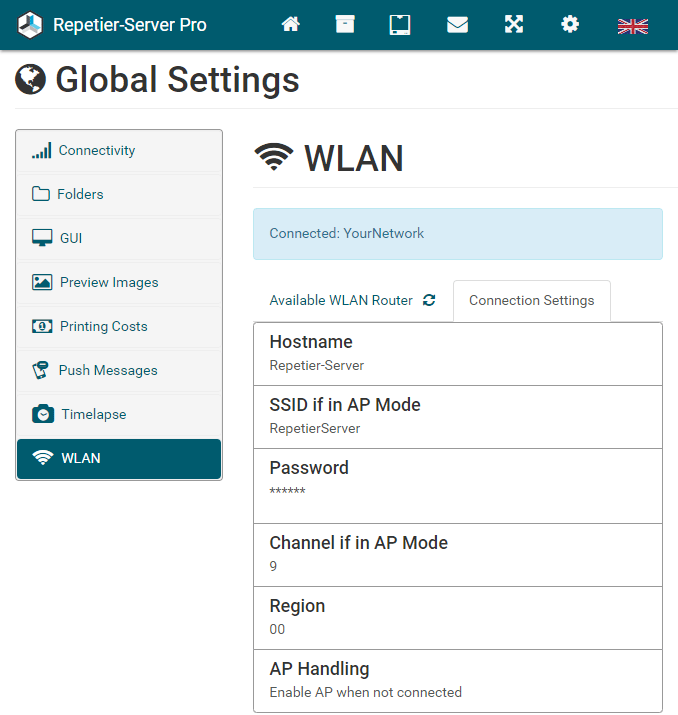
- Go to Global Settings WLAN and note your Hostname, SSID and Region in Connection Settings.
- Login via ssh (eg. using Putty or ssh on the command line). The default user is pi and the default password is raspberry.
- Stop Repetier-Server by sending:
sudo service RepetierServer stop
- Now it’s time to backup all settings and data. These are stored in the directory /var/lib/Repetier-Server and it’s subdirectories. The simplest solution to backup all files and folders in this directory is using a secure copy software like WinSCP or scp on your target PC, where you want to store the backup.
- If you made other changes to linux to get the image working also backup these files. Typical things you might have done are modifying /boot/config.txt, /boot/cmdline.txt, adding own scripts, installing additional display drivers, … Note that you can not always just blindly copy old configs back. New image might have new settings in the files. But with the old files it should be much easier to restore the old state.
- Now we have all relevant data on a different computer, so we can shut down the pi in ssh console:
sudo shutdown -h now
- Download the new Raspberry Pi image here and install it as described on your sd card.
- Start the Pi and connect it to the network.
- Login via ssh (eg. using Putty or ssh on the command line). The default user is pi and the default password is raspberry.
- Stop Repetier-Server by sending:
sudo service RepetierServer stop
- Now you need to change the permissions of /var/lib/Repetier-Server, so you can overwrite the files:
sudo chown -R pi /var/lib/Repetier-Server
- Now it’s time to restore your backup files. Copy them to /var/lib/Repetier-Server with a secure copy software like WinSCP or scp.
- Set the correct time zone in ssh console:
sudo raspi-config
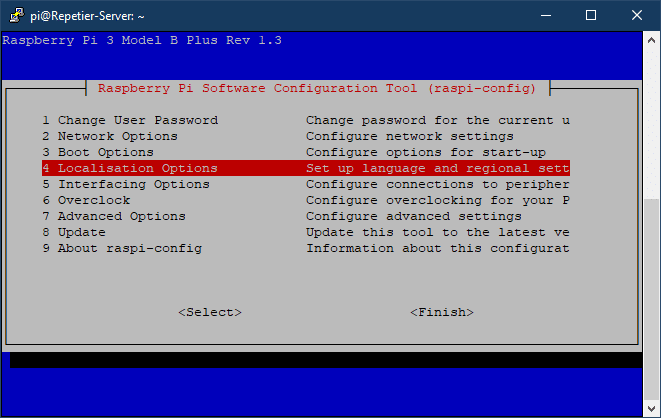
Go to Localisation Options Change Timezone, select your country and finish.
- Make your Pi more secure by using your own password. Enter in ssh console:
passwd
and change your password. Do not forget to save your password on a place, where you’ll find it later.
- Reboot the pi in ssh console:
sudo shutdown -r now
- Open Repetier-Server in your browser and go to Global Settings WLAN and make sure that Hostname, SSID and Region in Connection Settings are set like before.
- If you had a license key, go to the Register page and activate your license key.